
Redo att ta din restaurang till nästa nivå? Registrera dig nu och börja använda Fooodis.coms avancerade digitala verktyg helt gratis. Effektivisera dina processer, förbättra kundservicen och öka dina vinster med vår användarvänliga plattform. Kom igång idag utan kostnad och förvandla din restaurangs framtid!
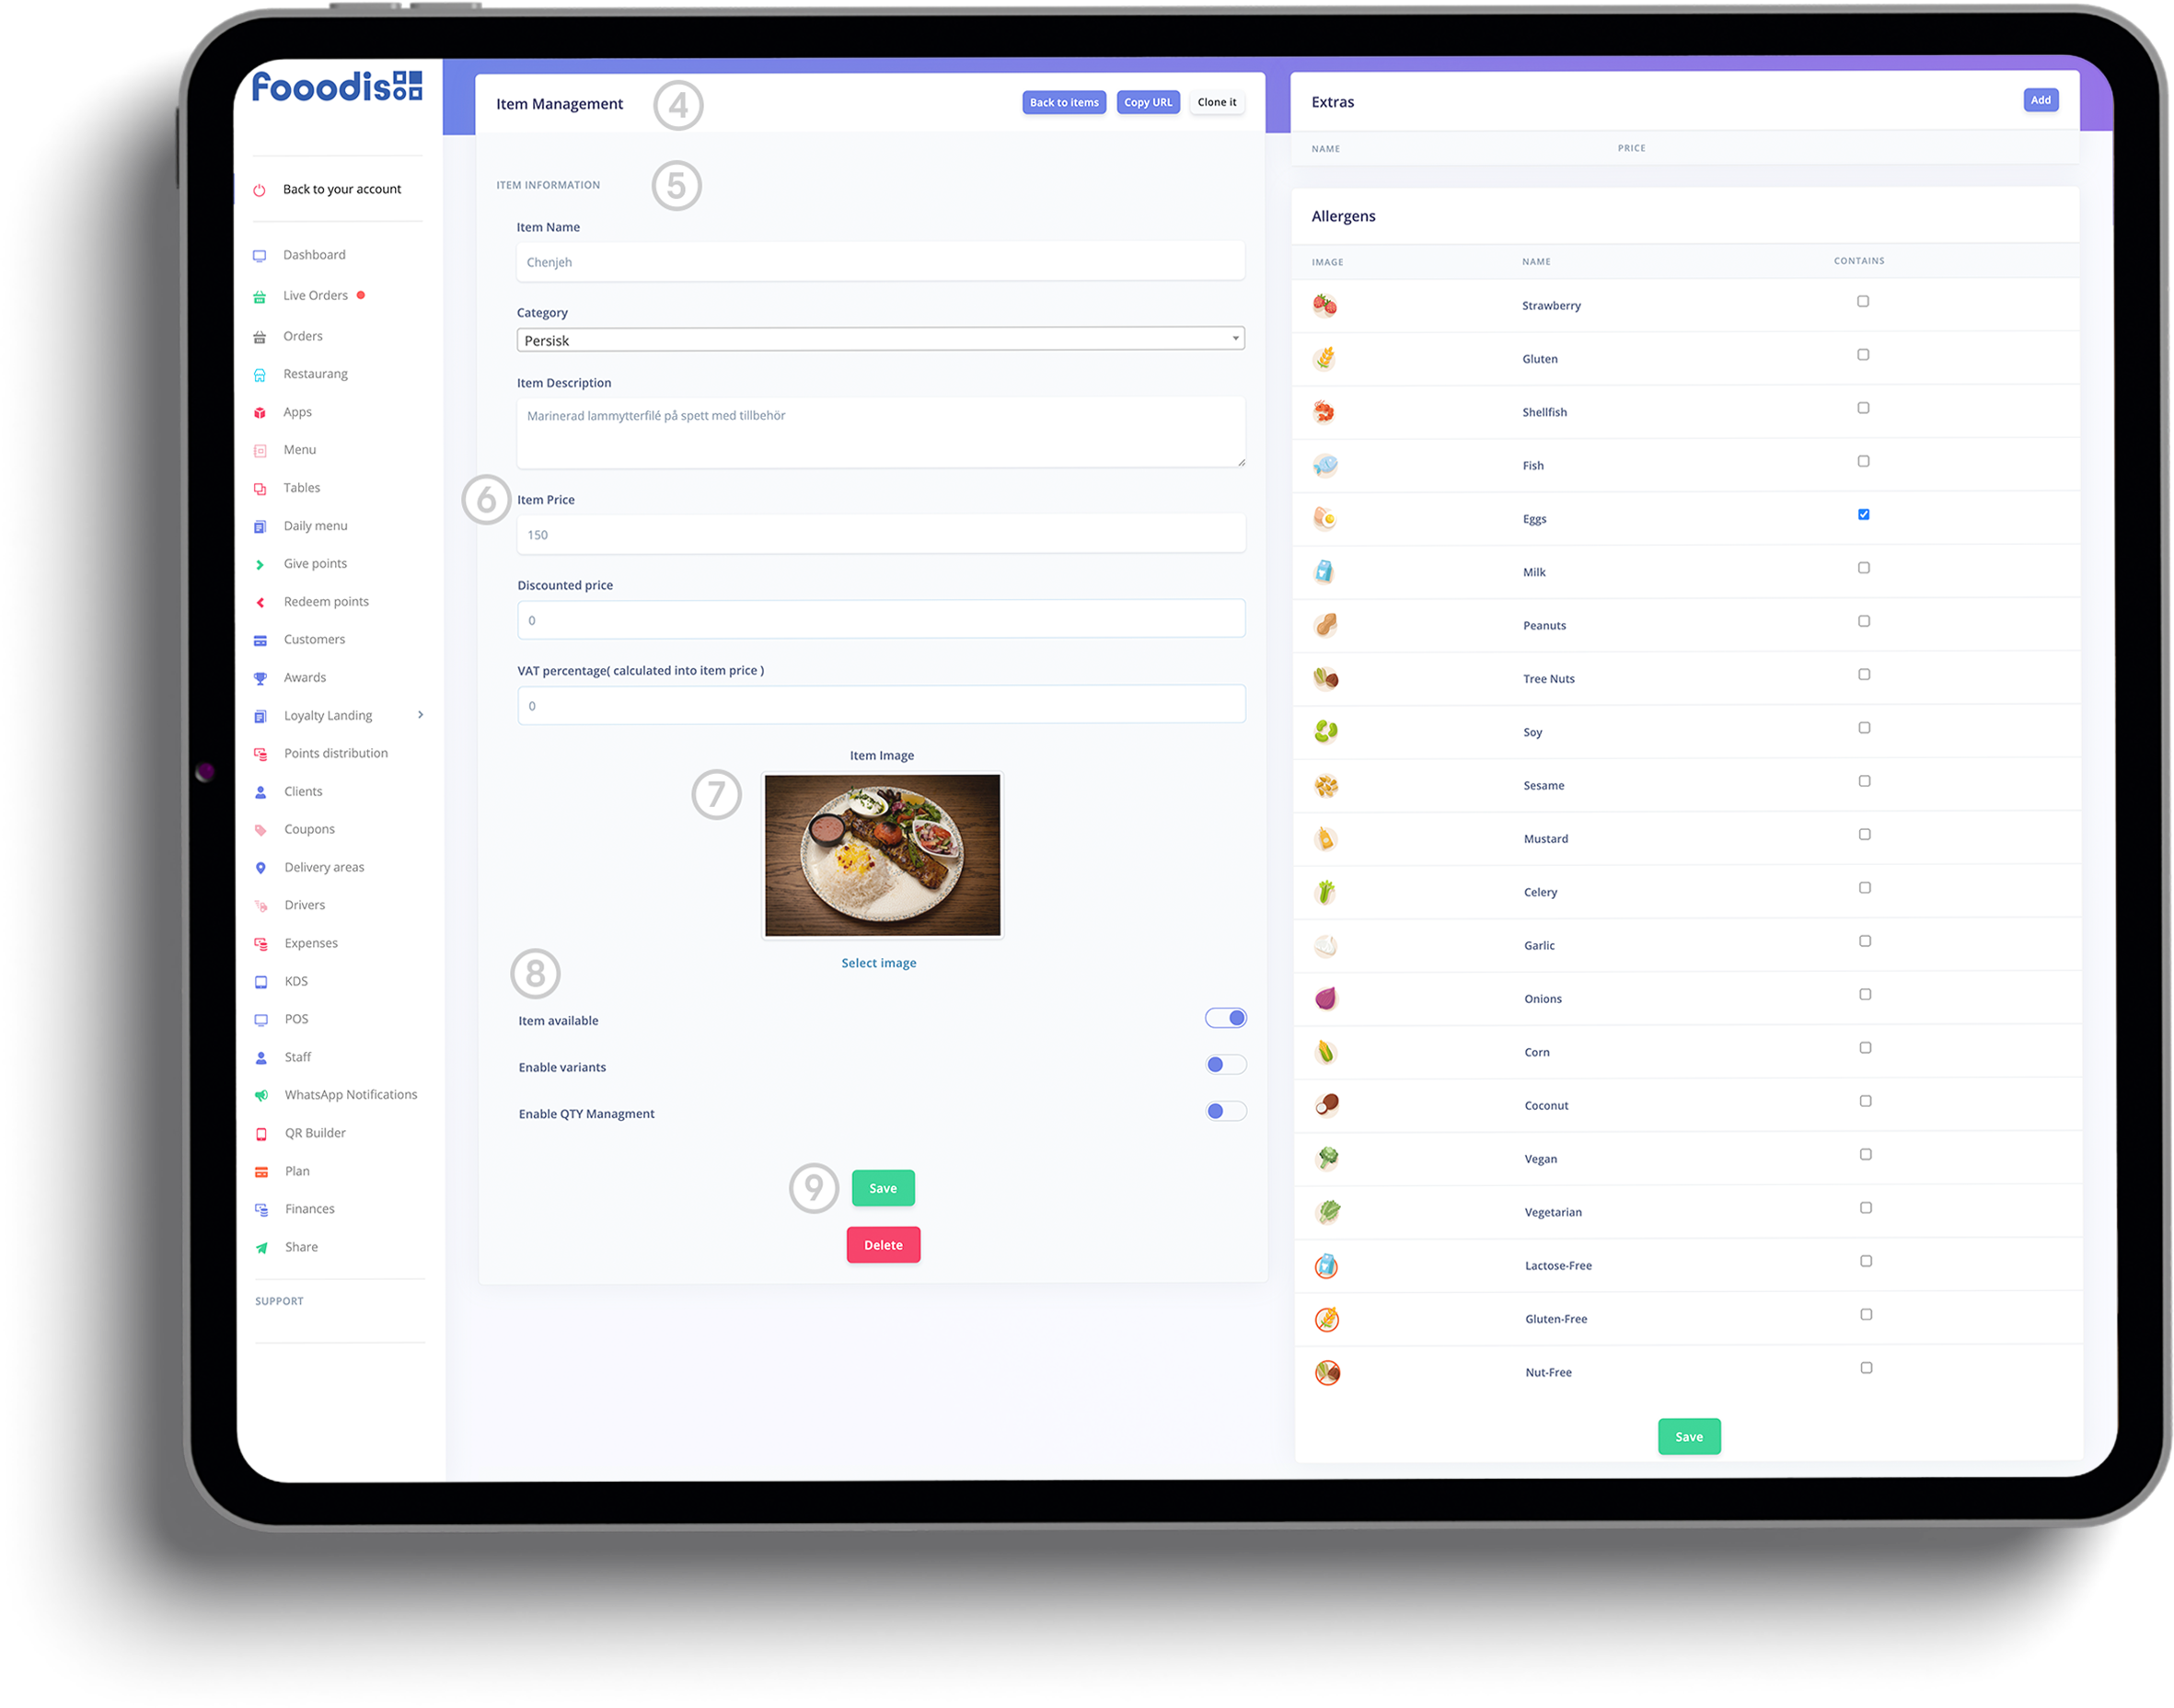
Fooodis erbjuder ett användarvänligt system för menyhantering som gör det enkelt för restauranger att skapa, redigera och organisera rätter. Från att lägga till kategorier till att uppdatera priser och tillgänglighet – allt kan anpassas i realtid. Med funktioner som bilduppladdning och kloning av rätter har det aldrig varit enklare eller mer effektivt att hantera din restaurangs meny.
Dyk in i vår fullt fungerande demo-webbplats och utforska kraften och enkelheten i Fooodis POS-system. Testa alla funktioner, anpassa din upplevelse och se med egna ögon hur vår integrerade plattform kan transformera din restauranghantering. Klicka här för att starta din resa!

Upptäck kraften i enhetliga sociala mediekampanjer, skräddarsydd innehållsdesign och kreativ digital berättande hos Logo Land Design. Vårt expertteam specialiserar sig på att designa, genomföra och övervaka digitala annonskampanjer för maximal avkastning. Vi skapar en unik varumärkesröst och strategi, skapar dynamiska animationer, producerar fängslande videonarrativ, fångar fantastisk fotografi och genererar engagerande, plagiatfritt innehåll. Höj ditt varumärkes närvaro med våra skräddarsydda digitala lösningar.
Din resa med Logo Land Design slutar inte här. Utforska våra ytterligare erbjudanden genom att besöka de dedikerade webbplatserna för våra specialiserade produkter: Webbplatsbyggaren, E-postmarknadsföringsprogrammet och Webbshopbyggaren. Varje produkt är utformad för att förbättra din digitala upplevelse och framgång. Upptäck mer nu!
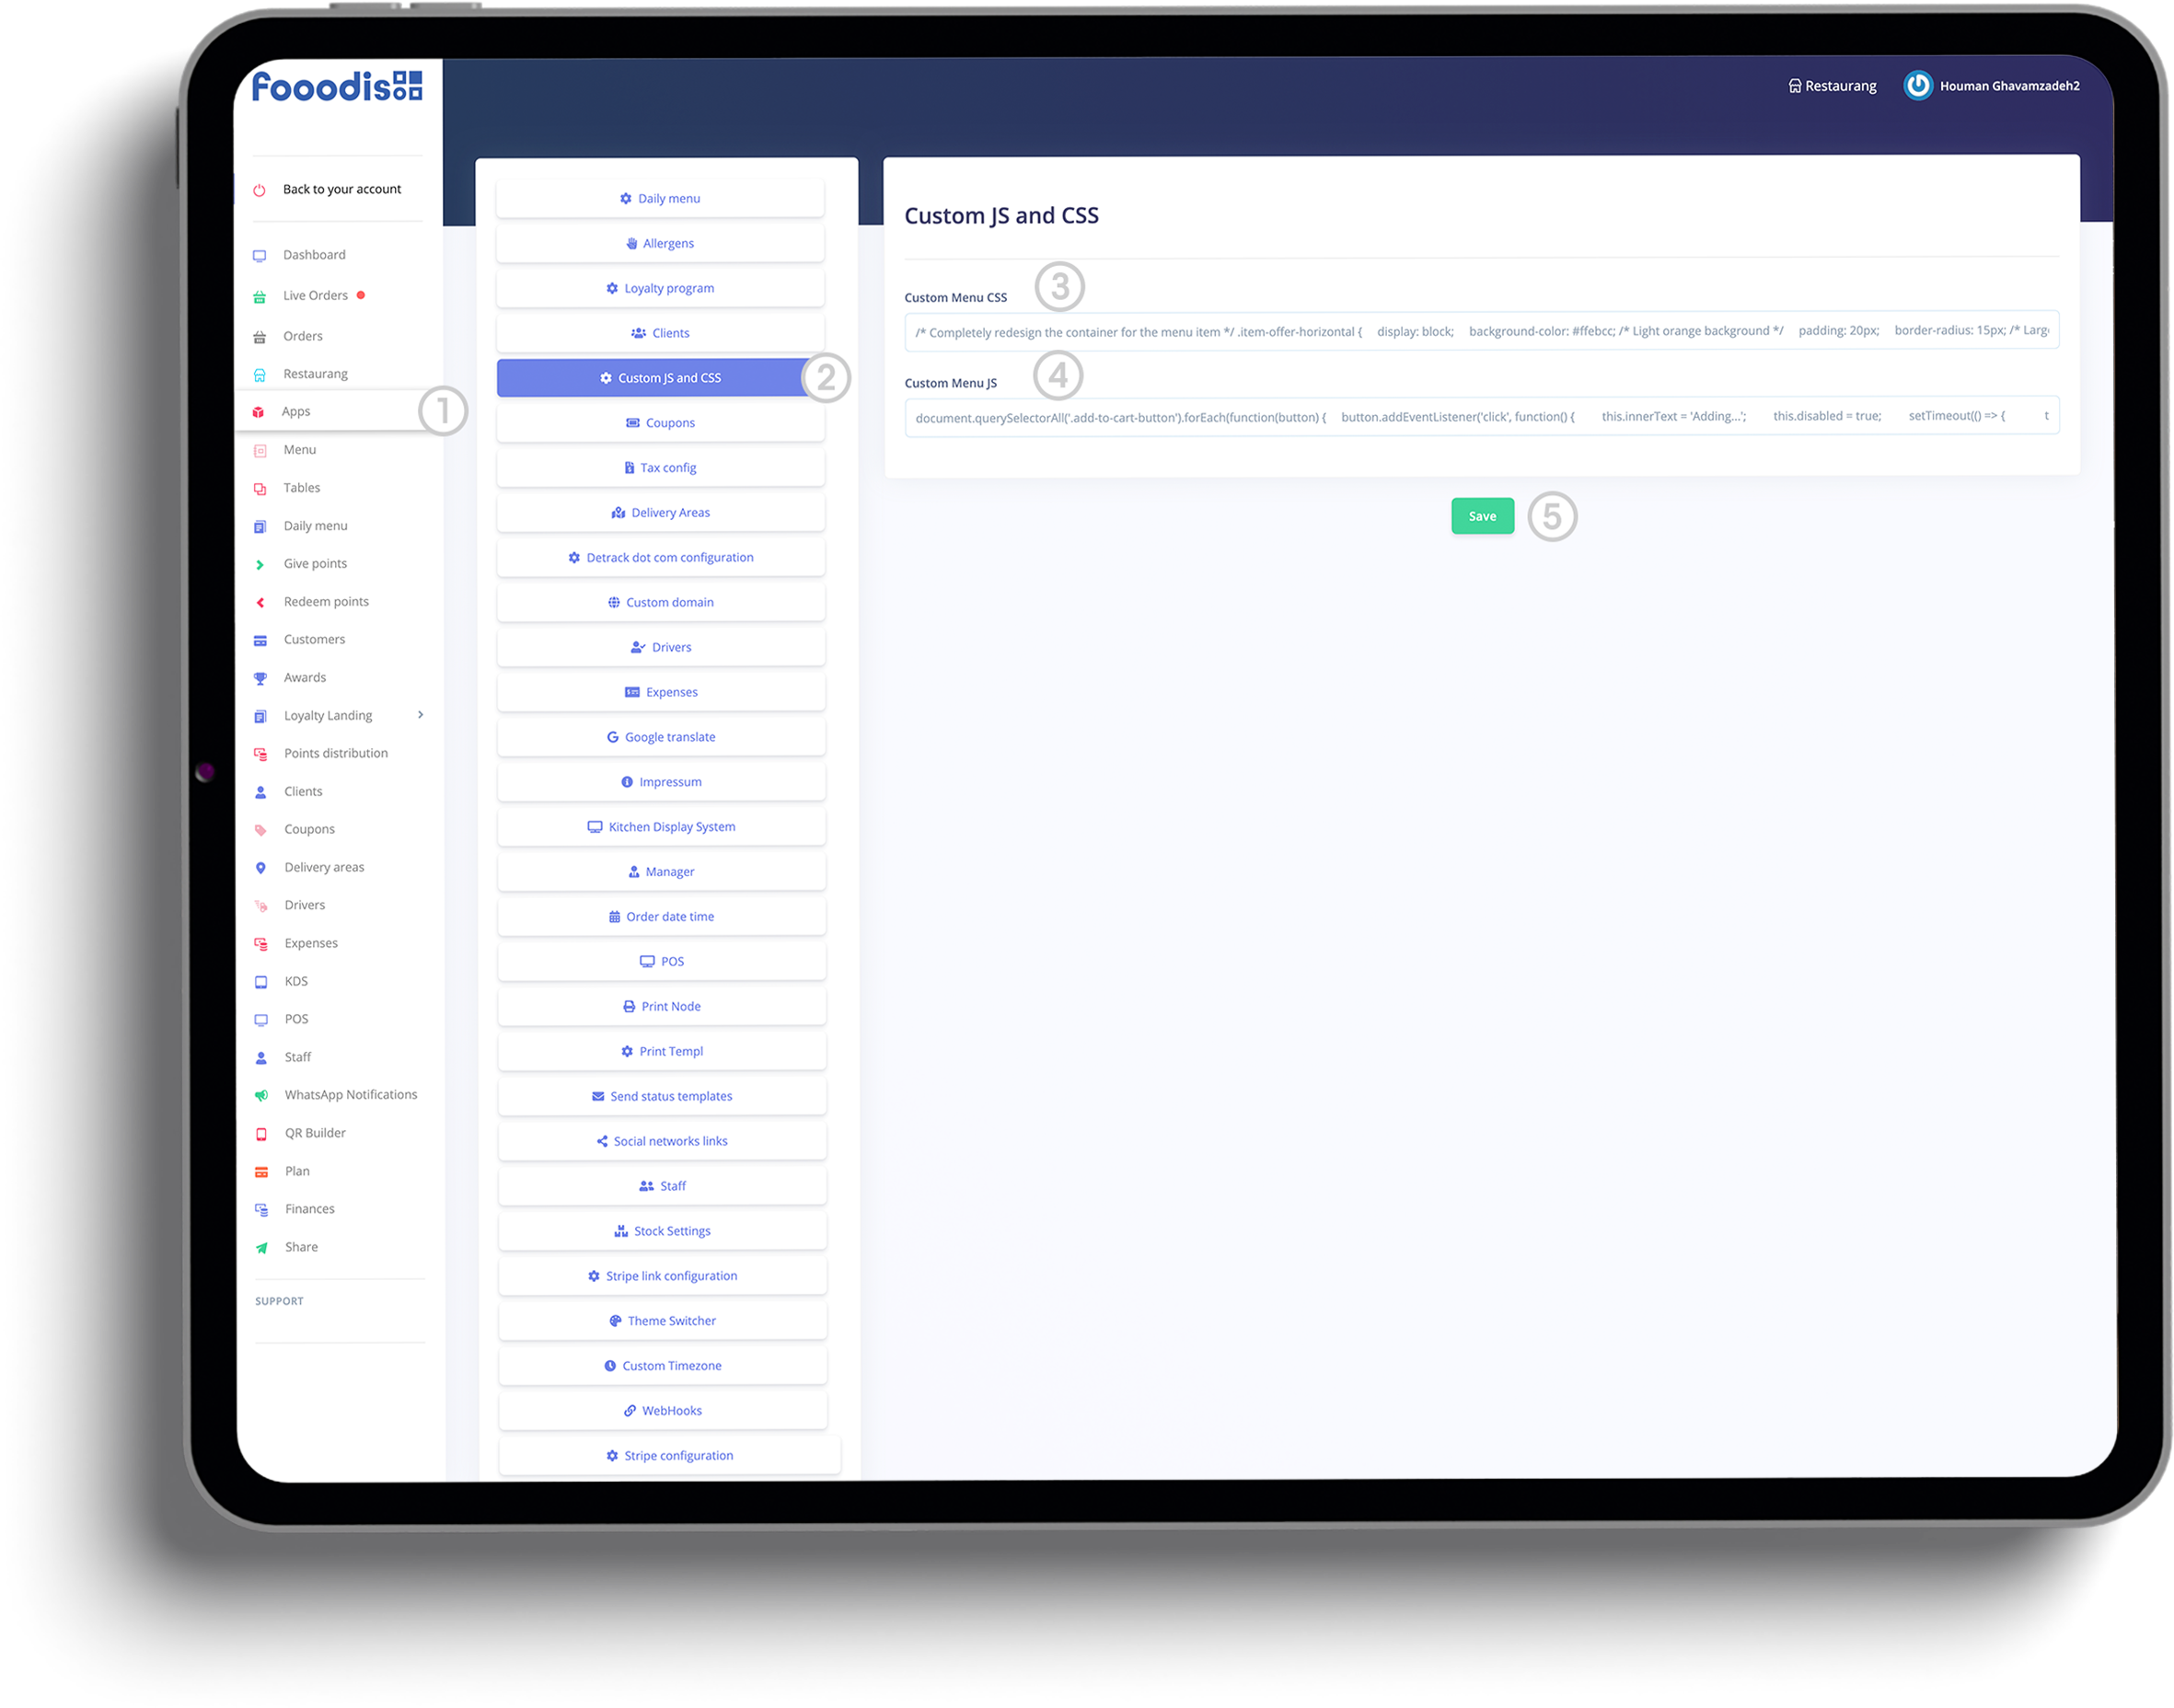
Att hantera din restaurangs meny på Fooodis.com är utformat för att vara intuitivt och effektivt. Oavsett om du lägger till nya rätter, organiserar kategorier eller anpassar utseendet och känslan av din meny, erbjuder vår plattform den flexibilitet du behöver.I denna FAQ-sektion besvarar vi vanliga frågor och ger steg-för-steg- vägledning om menyhantering, anpassningsalternativ och hur du optimerar din restaurangs digitala närvaro. Syftet med dessa frågor och svar är att hjälpa dig navigera plattformen enkelt och förbättra kundupplevelsen genom att hålla din meny uppdaterad och välorganiserad.